Today I am going to write about users, groups and their permissions on certain files and directories on CentOS. On other distros the procedure may very slightly but the concepts are all the same. Here I`ve used CentOS version 6.4 (This is hands on tutorial, Part 1)
USERS:
It is always a nice idea to create users according to their respective work on PC/workstation. And its easy to create users on Linux OS.
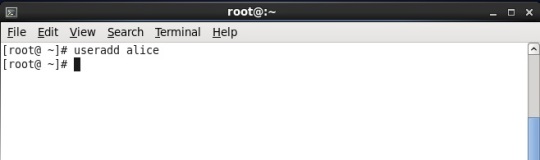
To add user, first open terminal(Applications -> System Tool -> Terminal) and type “useradd” followed by the name of the user you want to create. Below is its snapshot.
Note: If you get message like “Permission Denied”, then it says that you are not having enough permissions to create user. Simply switch to super user(root user) by typing “su -” and provide password for the super user(root user)
Above we created user with the name “alice”.
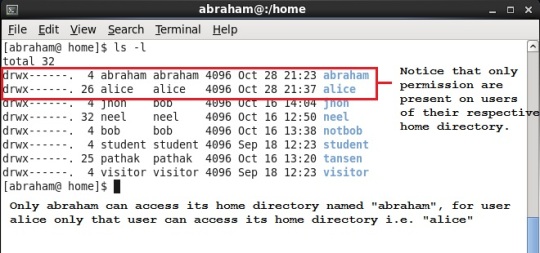
Remember, by default every user has its home directory and it has “/home/<username>” path. Below is the snapshot showing just that.
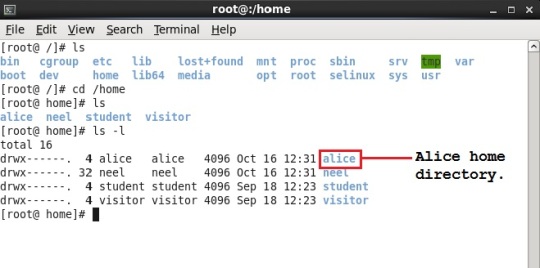
Remember that by default every user is present into its own group named same as user name.
Every user account is worthless without any password assigned to that user. So lets assign password to user named “alice”. This is done with the command “passwd” followed by the username. Below it is shown.
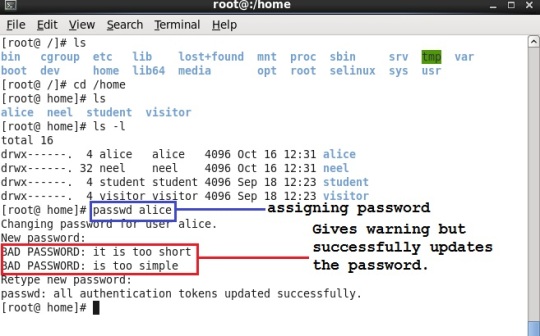 As you can see that we just assigned password as “alice” to user named “alice”. As this password was relatively simple, so OS gave warning but we assigned our password successfully thereby again confirming our password. The command is shown in dark blue color and warning message is shown in red box.
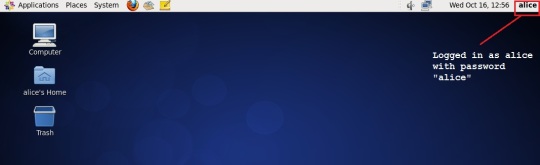
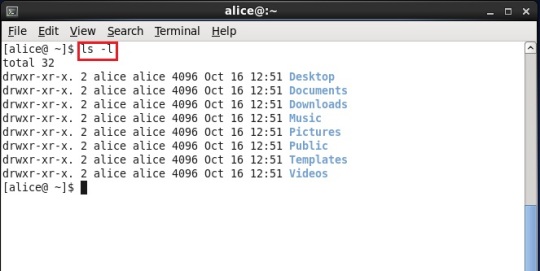
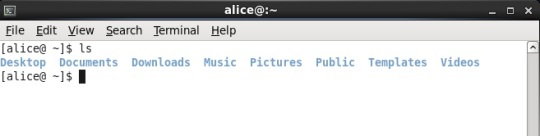
Now, just logout from this session (username -> quit) and login to user named “alice”. Open terminal and type command “ls -l” (shown in red). You can notice that all the directories appeared as Desktop, Documents, Downloads, Music, Pictures etc. in the alice home directory. Below it is shown in the snapshot. This directories were not before when we created the user from the super user account.
Try to change the password by the same command, just type “passwd” without username as we are already logged in with “alice” user so we will not give the username. If you give the username after command “passwd” then it will give an error stating “passwd: only root can specify user name”, means that when we are logged in as root then and then only we can give username after “passwd” command.
Now, if you will provide any simple password like that has same name as username or any dictionary based word then it will simply not allow you to change the password. But this was not the case earlier when we gave a simple password when we were logged in as super user(i.e. root user). Ahha that power to Super user. Amazed!!
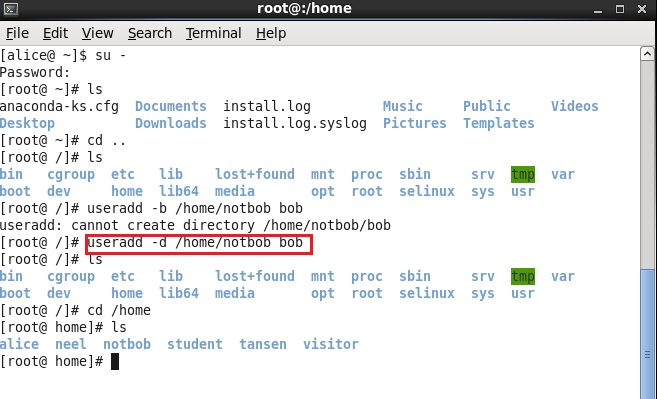
Again login as super user (or root user) and create a user named “bob” and we will change its default directory`s name to something else. This can be done from the command “useradd” followed by giving option “-d” and its path and then username.
“useradd -d /home/notbob bob” (Snapshot shown below)
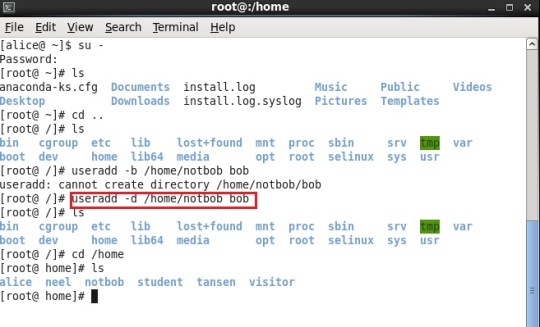
Remember, we just created different home directory for the user and not different group for these users. The users have the same name as that of their username unless changed. (See the snaphot below)
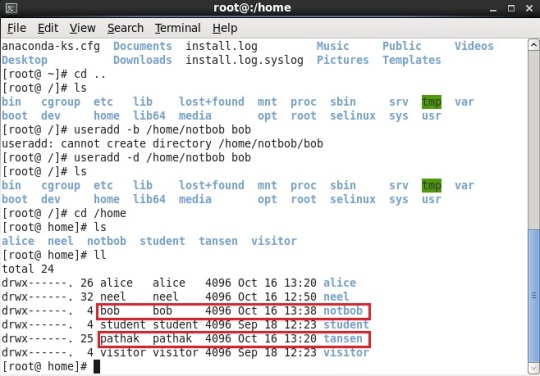
As shown above, “bob” user has same name of group as its user name i.e. “bob” group. Also it is shown in second example, there is “pathak” user which has “pathak” group by default and other home directory.
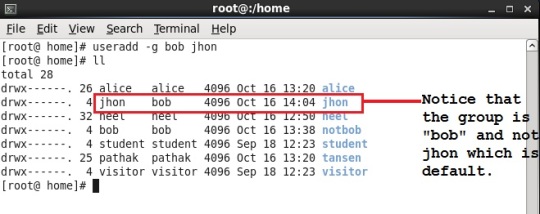
Lets create a user belonging to different group. For this there is a small change in command especially the switch of that command. We will create user named “jhon” belonging to the group “bob”.
“useradd -g bob jhon”
 It is also possible that a single user can belong to many groups. Lets see how.
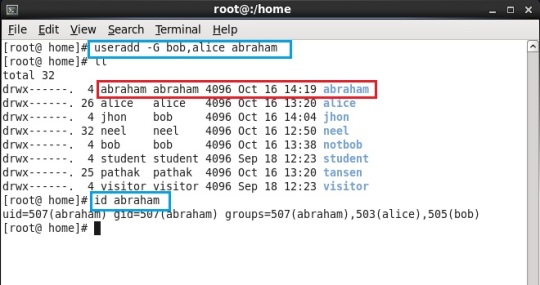
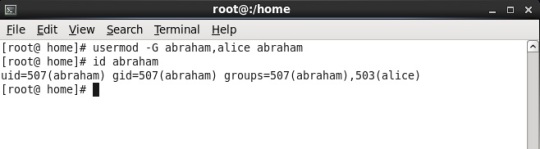
“useradd -G bob,alice abraham”
So, we have user abraham belonging to three groups, yes THREE groups. The first and default is “abraham” and other two are “bob” and “alice”
Amazed again?? Don`t be.
Remember: Whenever you create a user belonging to other groups, the default group is always there and its name is same as the user created with the same restriction of the group.
Also we can know whether the user is present or not from “id” command. It also shows other groups which that user belongs to. (Shown above)
Note: You can get full information about “useradd” cmd by referring its man pages. Just type “man useradd” on your terminal.
One can also look at the command “usermod”, just type “man usermod” to check options.
Pheww… Enough talking about users and groups now lets talk about permissions.
Permissions:
You can assign permissions to any files or directories under Linux.
Lets check it how.
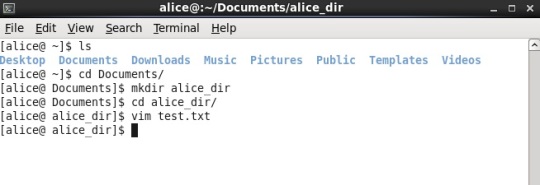
First lets login to one of the account just created above, lets say we are logged in as user “alice” (snap below)
Now, lets create a directory under documents directory and then lets create a test.txt file. (Shown Below in snap)
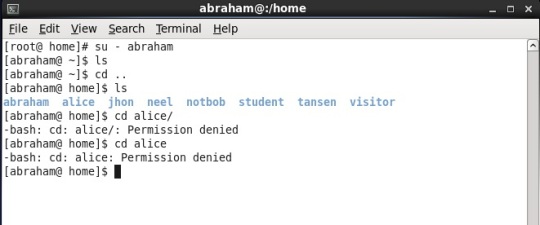
Change to some other user say “abraham” and try to enter into “alice” home directory, what do you notice? Yes you are right, you can`t enter into “alice” home directory from other user account. (Snap shown below)
Lets, add user “abraham” to the group named “alice”, we will do this by using command “usermod” (snap shot below)
Note: When you create any user you can specify groups explicitly there. But suppose the user is created and then you want to change its properties, then use “usermod” command.
Again lets try to login as “abraham” and again access the same directory i.e. “alice” home directory, what you notice?
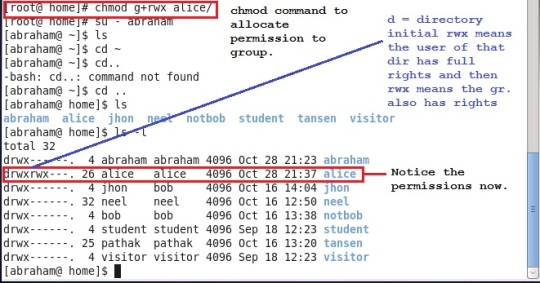
Eventhough “abraham” user belongs to both the groups “alice” and “abraham”, it is not able to still access that directory. This is because when we check its permissions we can come to know that what permissions exits on that directory.
Check its permissions with “ls -l” (Snap shot below)
Remember that the permissions follow in a specific order,
1) User permission
2) Group permission
3) Other permission
Earlier we just added our user “abraham” to the group named “alice” to access alice`s home directory. But we have not specified the permission for the group/groups in which it is present.
So, lets give group/groups a permission of r,w and x (r=read, w=write and x=execute). This can be done with “chmod” command. And again check the permission (Snapshot is shown below)
Note: Execute this command with root privileges.
Note:When we create a user, then the permissions are in restrictive mode by default. We need to change them according to our needs.
Commands that you can check for permissions are
1) chown
2) chgrp
3) chmod
Just open manual pages and go through it like “man chmod”.